


For both methods of installation, the security certificate will need to be installed to prevent Revit’s “Allow Add-in" prompt from appearing when end-users open Revit. The security certificate must be installed to the client computer’s certificate manager via Group Policy. The Security Certificate can be downloaded from our Downloads page.
Instructions: Distribute Certificates to Client Computers by Using Group Policy | Microsoft Docs
*Important: For step 4, choose Trusted Publisher instead of Trusted Root Certification Authorities.
To verify, check the user’s certificate manager (certmgr.msc):

Guardian is easily deployed to the firm’s Revit user machines by following the recommended workflow. The same .msi file that is used for manual installations will be used for the deployed installation.
A free Microsoft tool called "Orca", available from the Microsoft SDK, provides a graphical user interface for generating Microsoft transform files (.mst). The .mst file will tell the deployment how to install the .msi file.
Windows SDK Components for Windows Installer Developers - Win32 apps | Microsoft Docs
1. After installing Orca, load the .msi file.

2. On the main menu, click New Transform.

3. On Property change the following options:
a. USEROPTION = 2 (This will make sure that files will be deployed at “ProgramData”)
b. EulaForm_Property = Yes (This will default the License Agreement to “I Agree”)

4. On CustomAction, insert the Company ID provided to your firm into the Target column adjacent to COMPANYID. This will automatically deploy the company key file on the correct folder during installation.

5. Click on Transform then Generate Transform and save it on the same folder as the .msi that will be deployed.

The tools for deploying Revit Add-Ins are quite diverse. Here is a sample command line that can be used in a deployment tool of choice, such as PDQ:
Sample command line:
msiexec /i "<path>\<filename>.msi" /qn TRANSFORMS="<path>\filename.mst"
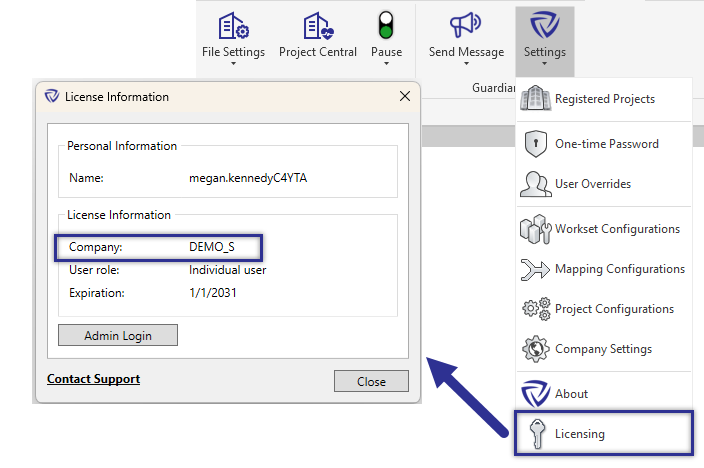
Open any version of Revit and navigate to Add-Ins > Guardian > Settings > Licensing. The company name should be visible on the License Information dialog as shown below.
If assistance is needed, please reach out to our team at support@iconicbim.com.
Once the test deployment is verified, continue to deploy to all necessary machines.
Please note that Guardian licenses are only activated once a registered project is opened on the end user’s machine. Guardian can be deployed to all machines without having to worry about using licenses.
Once a new account is created, an email will be sent providing a link to download the Guardian installer as well as the Company ID.
Once the installer is downloaded, open it to run, the setup wizard will appear. Click Next to continue.

Read through the license agreement and click I Agree. Click Next to continue.

Select who to install Guardian for. It is recommended that you select All Windows Users. Click Next to continue.

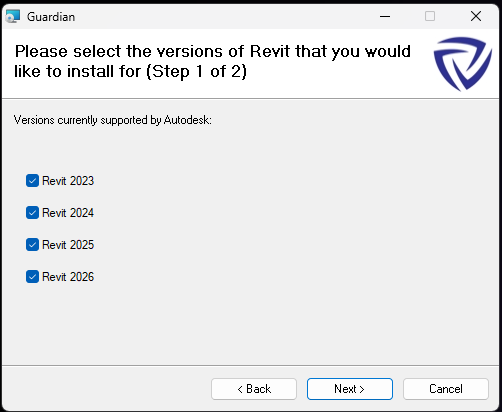
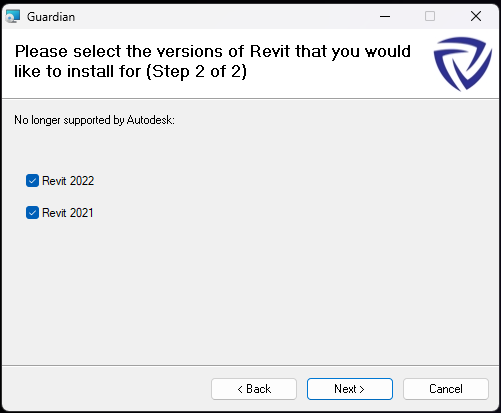
Select the desired Revit versions to install Guardian for. There are two pages for the different versions; one for the currently supported versions of Revit and the second for the unsupported versions. Click Next to continue.
Guardian will prompt for the Company ID. The Company ID is used to make sure all users within a company are connected. If set incorrectly, users will not be able to utilize the full capability of Guardian.
If the Company ID is set incorrectly, it can be replaced in the Guardian.key file located in one of these two locations:
Click Next to continue.

Click Close to finish installation.

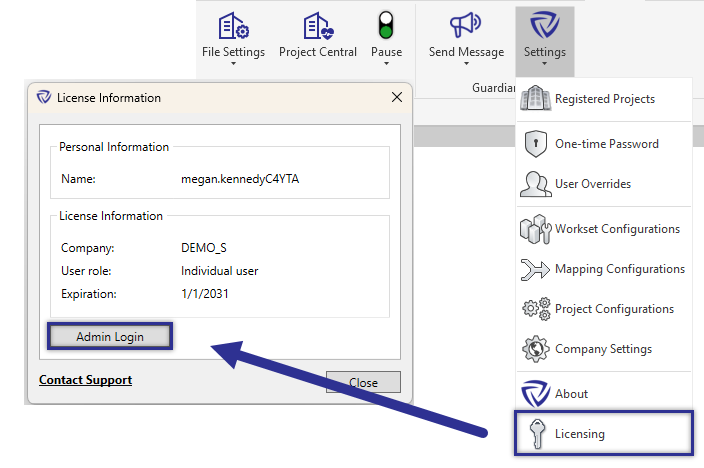
Guardian is now ready to be utilized! To take advantage of the Project/Company Administrator features, login through Licensing > Admin Login.
For end-users (non-administrator users) of Guardian, their accounts will be authenticated automatically through the Company ID and will be able to use Guardian immediately when opening a registered project! No user management required!
