


Contact our support team for more information.
In this article, we will walk through the steps necessary to utilize the Workset Configuration and associated features.
Through the Workset Configurations, sets of worksets can be created to be implemented in projects. Additionally, rules can be added for the worksets that can be used for manual and automatic assignment of elements to specific worksets. The automatic workset assignment will apply any rules when elements are placed. Workset Configurations can be found under Settings.

In Workset Configurations, there are three sections: Sets, Worksets, and Rules. Each set can contain multiple worksets. Similarly, each workset can have multiple rules created.
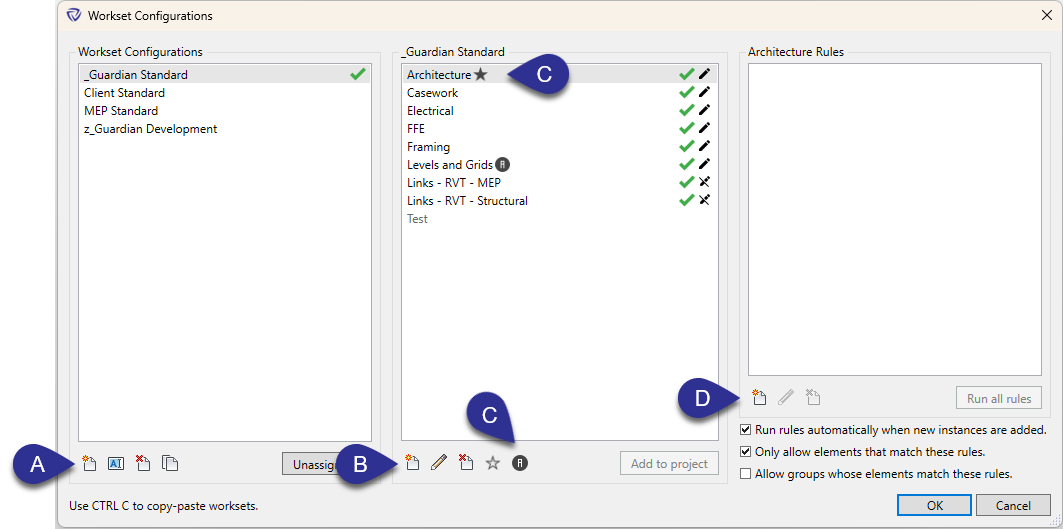
(A) Click the New button to create a set.
(B) Click the New button to create worksets for each set.

(C) Worksets can be designated with the Star or Grid Head icons. These icons will show which worksets will replace Workset1 and Shared Levels and Grids respectively. This replacement will happen either at the onset of worksharing or after the fact when added to the project through Workset Configurations.
(D) Rules can be created for each Workset. These rules can allow for automatic assignment of worksets when elements are placed. These rules can also be run manually by admins through Workset Configurations by selecting a workset and clicking Run all rules. For more information, see the article on Rules.
When creating new rules for worksets, it is recommended to test them to make sure they are working as intended. The best way to do this is to enable the workset features in Project Settings for a test file you have open.

See the Workset Configurations section for more information on how to use these features.
