


Contact our support team for more information.
Guardian protections, features, and analytics will only work if project files are registered. Even if none of the Guardian features have been enabled, having projects registered will allow some of the basic functionality to be utilized, such as:
Project models must be registered before Guardian will be activated for a given project. There are two ways in which projects can be registered:
This allows Company Administrators to determine what type of projects will be registered. For instance, a non-workshared project model may not want to be registered as it’s only for specific study or only register project models hosted on BIM360.
Project models can be registered automatically based on some predetermined rules. The rules can be set up under Settings > Company Settings > File Registration.
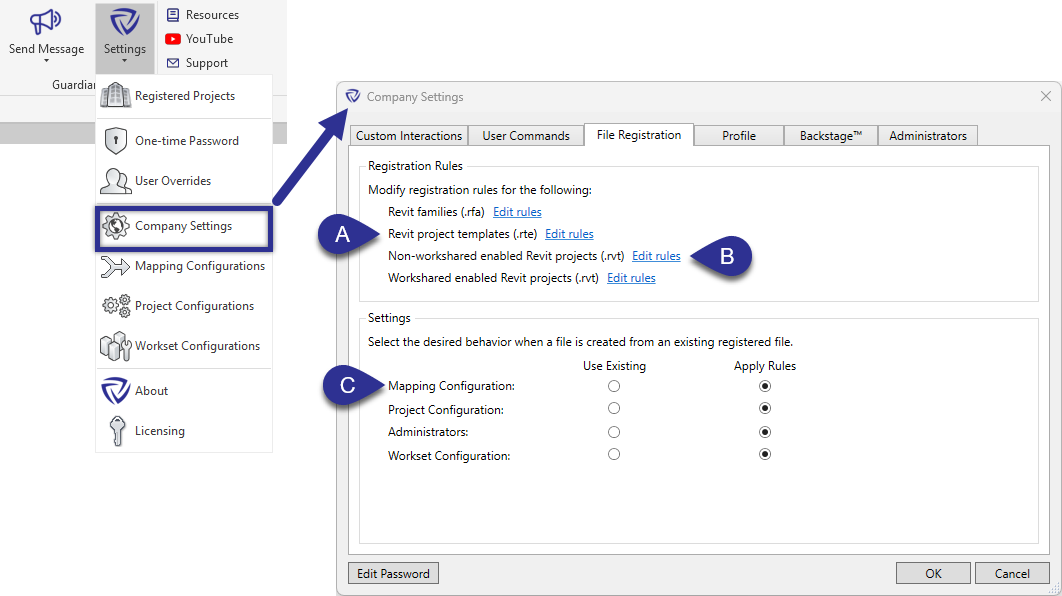
(A) Registration: Rules can be created for different file types to be registered automatically when created or opened.
(B) Click the Edit rules button next to each model type to further specify the conditions in which the models get registered.

Within the Rules dialog, many different conditions can be added in AND and OR configurations similar to Revit View Filter rules. Use the Add Condition button to add conditions from the available condition types.
Each rule can be used to register files automatically or to apply the selected configurations when registering files manually. To disable automatic registration, select the Manual registration only checkbox.

(C) When creating a model from another existing registered model, the registration behavior can be specified to either use the existing Mapping Configuration, Project Configuration, Workset Configuration, and Administrators, or to apply fresh registration rules based on current needs.
Project models can be manually registered by selecting the Register Project button in the Guardian Add-Ins tab.
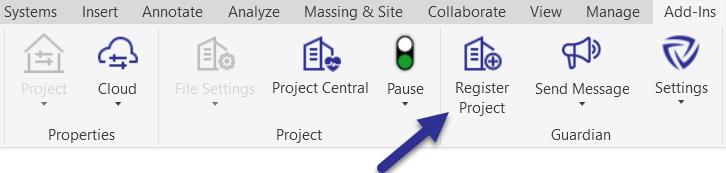
When manually registering files, a prompt will appear for administrators to specify the desired Mapping Configuration, Project Configuration, Workset Configuration, and Administrators. If any set rules apply to the active project, the configurations will be filled automatically based on the rule's selection.

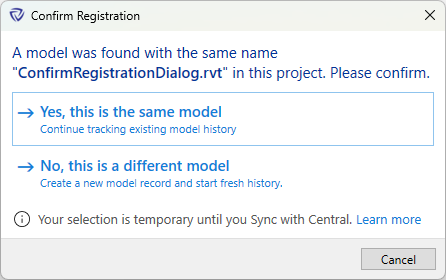
The Confirm Registration dialog appears when Guardian detects that the model you are registering matches an existing registration.
A match occurs when either:
Model names are often reused in standard AEC workflows. For example:
To prevent team confusion when rebuilding or replacing models, a Model Manager should open a local file first, resolve the Confirm Registration dialog (if prompted), and save or sync before the rest of the team begins work.
How the dialog behaves:
In certain workflows, the dialog may appear unexpectedly when auto-registration rules are enabled.
This can occur when:
After saving a cloud model locally for maintenance:
This resets the session and ensures Guardian evaluates the model correctly, preventing unintended duplicate registration prompts.
Using Restore Version typically does not affect registration.
The dialog appears only if the restored version predates the point at which the Guardian ProjectGUID was written into the model.
Important
